Showing posts with label making. Show all posts

Saturday, May 7, 2011

Working on the move with my (not so shiny) new Treadmill Desk (which I made myself) !

So I  Googled 'news' and found this great article online called 'Is sitting a lethal activity?'

And it spurred me to take immediate action since it's now May, and my contest finish line to give away a mouse to whoever guessed my weight the closest on July 1 is fast approaching.

And I haven't lost an ounce (yet - there's still time!).

About the article...

Basically some doctor scientist boffin type by the name of Dr. James Levine developed some undies that constantly detect any physical movement.

Then, I suppose, he thought of a really good use for them....

A number of people as test subjects were fed an exact amount of calories every day.
Their weight was stable.
Then the calories were increased (by a thousand a day if memory serves).

They weren't allowed to exercise.
Some started gaining weight, while others didn't.

An examination of the data collected from the undies showed the ones that didn't gain weight were subconsciously adding fidgety movements into their daily routine to burn off the excess calories, while the others (who gained weight) didn't move any more than usual.

Then it mentioned something he came up with: A new phenomenon called 'Treadmill Desks'.

So I just made one (I'm plodding along at 1mph as I write this).

I wonder if I might have a tendency to do the opposite of the fidgety people:
Perhaps, with a calorie deficit formed by exercise, I'll eat pillows in my sleep.
Or perhaps Meridee will wake up missing an arm?

But I hope not!

Here's how I made my treadmill desk...

I built a dimensionally accurate (although very simplified) version of our treadmill in SketchUp, along with my proposed design for a desk and shelf.

my simplified rendering of my treadmill and envisioned desk - the computer and accessories were swiped from Google's 3D Warehouse.

Then I got all carried away and decided to add my drawing/computing room too...
Just to see  how it would look in situ...(much neater than in reality, as you will see)...

The 3D person needs a bit more belly, but he came that way (from the 3D Warehouse) so I'll use him as inspiration...


We've had this treadmill for years and, of course, never used it.
I've tried to give it away twice.

Now I'm glad I had no takers.

I bought my supplies from Lowes...

Treadmill Desk supplies


I got busy with a drill, saw, and screwdriver.
Can you spot the deliberate mistake?

Checking it out in the living room...


Getting the treadmill through my door (which I had to take off) was the hardest part.
I had to fold up the belt, lay it on its side, and using carpet sliders, jiggle it about until I got it through the door.

Then came the woodwork assembly...


Here's the deliberate mistake


Oops...won't be able to shut the door when I put it back on!


A bit more work with the screwdriver and....

That fits much better!

I used a lot of non-slip rubbery stuff between the desk layers to reduce vibrations to my computer.
rubbery 'shock absorbers' on the treadmill hand rests, on which the desk top is placed

Now as I either work (or waste far too much time - whichever fits the bill) on my computer at least I'm losing a bit of lard (I hope!).

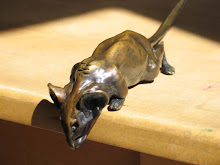
Ta-Daaa....Me hard at work on my completed treadmill desk with Sprightly mouse along for the ride...

Now I need to go and have a sit down!


Learn lots more about treadmill desks...Click HERE
Treadmill desk blog...Click HERE


.


Click these links to visit my website... SteveWorthingtonArt.com - Sculpture that loves you back
or my Etsy store, CritterVille
.

Saturday, April 30, 2011

How to make a bronze bas relief award plaque honoring Bob Barker...Part 3

My plaque came back from the foundry.
Lee chopped off the sprues, welded a hanger on the back (just in case it's ever taken from its frame), and gave it a once over in the sandblast cabinet.

sandblasted bronze, ready for patina


After that, it's time for me to create the patina (being sure to take all the necessary safety precautions, of course).
I gave it a soak in sulphurated potash (just a sprinkle, mixed in water) to turn it black.
Then I scrubbed it back with a scotch brite pad, and then some very fine steel wool.


After that, I heated it with a weed burning torch and sprayed on a mix of ferric nitrate and cupric nitrate, then waxed it while hot.


A quick buffing after it cooled was all that was needed before popping it into a its frame.


Next stop: Mercy For Animals.
Final destination: Bob Barker!

I've cast only two of this version (one to be given to Bob, and one for me to keep), but when I get a bunch of my non-award version cast (which has a cloudy sky instead of award lettering and will be sent to galleries) I'll post pics of that too.

This has been both an honor and a great deal of fun to make.
Thanks Mercy For Animals!

And thanks Lee for helping me get it done in time!


.

Click these links to visit my website... SteveWorthingtonArt.com - Sculpture that loves you back
or my Etsy store, CritterVille
.

Saturday, April 23, 2011

Michael Tatom's bear necessities...


I'm friends with jeweler and sculptor Michael Tatom.

Our styles of work and sculpting approaches are very different.

My approach so far has been additive with a focus on a certain kind of realism, while Michael's is subtractive and more stylized.

I've always been impressed by artists who can pull off the subtractive method as Michael does with such excellent results.

Luckily he's taken some pictures, so I can share his process with you here...

He'll start with just a couple of pictures of  his intended subject for reference.
I think he's rather amused by my piles of reference pictures when tackling a subject!

First he makes fairly orthographic drawings to transfer onto a block of very hard jeweler's carving wax.

If his wax isn't a thick enough block, he'll heat up surfaces and stick them together.


He's etched along his dotted lines.

Then he uses a band saw to roughly cut away the waste areas, before going back in with rotating barrel grinders.
No prizes for noticing that these next pics are of a different bear!

And some other things...


Barrel burr
'action'... demonstrating on another piece of wax


Not yet fully smooth...


As the form nears completion he moves on to files and gravers, finally finishing up with paper towels and solvents to achieve his signature smooth surface...

Getting scraped...

Files, gravers, and burrs

Look at those skinny files. I reckon Michael could probably do you a half decent root canal in a pinch...

 Here's a magpie ready for molding...
His paintings aren't nearly as refined as his sculptures, as you can see on the cupboard door :)

A small sampling below...


See Michael's website HERE...
or his Etsy store HERE...

All pictures in this post are copyright Michael Tatom, and used with permission.


Click these links to visit my website... SteveWorthingtonArt.com - Sculpture that loves you back
or my Etsy store, CritterVille

Saturday, December 25, 2010

Turtle maneuvers, and rock hard headaches...solving my granite drilling and bronze mounting problems

These guys are heading off somewhere with a united purpose in their semi aquatic minds...


Drilling holes in the granite bases and screwing in the semi submerged turtles for Bumper to Bumper was giving me some major headaches.
Some turtles were drilled and tapped with a smaller size hole for 10/24 screws, while the others were larger for quarter twenty screws. I got different turtles cast and metal worked at different times, which explains that.

Keeping organized was a lifesaver, with each base numbered, and each turtle marked on its underside according to which base it went on and it's position in the lineup.

Getting the hole locations marked was easy enough. After smearing some release agent with a Q-tip around each hole on the undersides of the turtles (thanks for that, Lee) I pushed a flattened pea sized ball of soft waxy clay over the hole, positioned all the turtles on the base and then removed them.
Voila!
Six little flattened bits of clay with short stalks corresponding to the holes under the turtles were stuck nicely to the granite.

Then I just lowered the right sized diamond core drill bit into place, clamped the granite, surrounded the area with a dam of clay, filled the dam with water, removed the tiny blob of clay I was aiming the drill at, and slowly and carefully drilled through the rock on the slowest speed my drill would go.
I've mentioned before how much I love that rubbery stuff on rolls you can buy for your cutlery drawer from the supermarket.
I find it great anytime I need some grippy friction and cushioning, so it was great under the granite to help hold it steady.
I took my time and lifted up the drill several times so as not to overheat the granite since that might cause it to crack.
When the drill went right through the water drained out into a bowl underneath and I repeated the process until done.
I used a chinagraph pencil to remind me which were the quarter twenty holes on the granite (so I didn't drill the 10/24 ones with the same bit)
My legal disclaimer goes here...water and electrical appliances don't mix. So of course I'm not suggesting you do what I did, I'm just saying it's what I did. Check with the manufacturer of your drill press to find out what you should do, and of course wear safety goggles.
And a snorkel too, if you like.
Oh, and super hot bits of rock could shatter and fly off and do you or others all kinds of damage.
So wear all the appropriate safety gear and keep kids/pets etc away.

I used a half inch glass and tile bit (looks like a spear) to widen the holes and act as a countersink on the back side while spritzing the bit with water to keep the granite dust from rising, and to keep the drill and granite cool.
So, to continue my legal disclaimer, don't drill anything without using a proper air filter on your face or the dust might kill you. Only work in well ventilated areas. And get the proper supervision.
And don't get water on electrical equipment. That's just asking for trouble.
So the procedures I've taken and am describing here are not meant as advice. They are for your entertainment so you can marvel at how I have somehow survived such reckless behavior. (so far, anyway). So view this not as a 'how to' post, but as a 'how NOT to' post.

Best to simply hire a pro.

So later I used a nylon washer with each screw. The washer is essential otherwise the screw gets jammed in the hole, while the nylon washer can become crushed into the hole and provide some compression for the ever tightening screw.

That worked wonders for the smaller 10/24 screws, but the larger quarter twenties didn't have the wiggle room and got jammed up inside the narrow 1/2" wide steep sided hole.

A 5/8 or 3/4 masonry bit turned out to be the answer to that problem.
Masonry bit

Depending on how deep you make the countersink, and how many nylon washers you use, and how long your screw is, and how thick your granite is, you can get it to work out every time.

Before I got the masonry bit to use as a countersink I spent a whole evening messing about trying (unsuccessfully) just to get a couple or three turtles screwed into place that were needing quarter twenty screws. It was a frustrating nightmare.
But when I got better tools to do the job, it was a breeze in comparison.

For quarter twenty screws I'll use a 5/16" diamond core bit, and a 5/8" masonry bit for the countersink, with 1/2" screws and one or two nylon washers in each for granite 3/8" thick.

For 10/24 screws I used 1/4" diamond core bit, and the 1/2" glass and tile bit that looks like a spear.
I'm sure a 1/2" masonry bit would work great for that too.
After some clean up, felt dots go on the bottom of the granite to keep it from scratching the furniture, unless you're really determined of course.
Where there's a will there's a way.

Oh, I almost forgot, Merry Christmas!


Click these links to visit my website... SteveWorthingtonArt.com - Sculpture that loves you back
or my Etsy store, CritterVille

Saturday, December 18, 2010

Through a glass darkly...here's a spooky looking scene...


Cut up bits and pieces embedded in mold material, waiting to be cut out so waxes can be made.

You might recognize the snail from one of my shoe horns, and of course a tree frog which I'm making as a stand alone wall mounted frog.

That isn't Rumplestiltskin in the background spinning straw into gold, it's Lee flattening the bottoms of my Bumper to Bumper mid size turtles.
Somehow he manages to keep his fingers off that fast spinning abrasive disk (I'm very glad to say).


Click these links to visit my website... SteveWorthingtonArt.com - Sculpture that loves you back
or my Etsy store, CritterVille

Tuesday, November 23, 2010

Impatience vs Perfectionism...

So you have an idea for a piece.
And you're itching to see it done.
You have some clue of how certain things must look - how good they have to be - in order to make seeing it finished worth while.
If you're anything like me these two opposing forces of impatience and perfectionism pop up as a dialogue time and again when you're working on a piece.

Just like the little devil on one shoulder, and the little angel on the other, lazy Steve and perfectionist Steve perch whispering in my ears...

'Go on, just slap a bunch of clay on there and fill out the shape, you'll get an idea of how it will look finished much sooner that way'

'Don't listen to him, get the proportions right, you'll only have to pull it all off and do it over when you realize the proportions are all wrong'

'Come on, this is taking forever, why don't you just fill out that bit really quickly and see how it looks'

'You know if you don't work out from the skeleton and carefully add the muscles before you concern yourself with the surfaces it'll look like a lifeless blob, then where will you be?

'Don't listen to him, your sketch is lively enough, did you start from inside out with that?'

'You're only going to make it once in clay, it will be around forever in bronze, and it will have your name on it. You want to cringe and wince every time you see it?'
First little clay sketch I did of sumo wrestling toads

Completed clay (table top size)

Sumo wrestling toads large version in bronze

There's lots of other thoughts and feelings swirling around besides these, but  these tugs of war never go away for long!

Although I do take pride and pleasure in the things I've made, as soon as something's done, then there's always the next thing.
But the last thing still has to take on its final appearance in bronze.
And there's always a lot to be done before that happens.

And time itself continues the work where I left off, hopefully revealing depth and character and continuing to tell the story of each work through the changing patina of age.


Click these links to visit my website... SteveWorthingtonArt.com - Sculpture that loves you back
or my Etsy store, CritterVille

Sunday, September 26, 2010

Trying some things out, and this year's Barkin' Ball...

Tiny swimming bronze turtles in resin 'water'


Originally I wanted to make bronze turtles swimming through glass that was cast around them.
But I asked a glass blower and learned that it would crack and break up as it cooled around the hard metal, so I explored other options, deciding to give a urethane resin a try.
I was advised to wear rubber gloves and eye protection, and avoid getting the uncured resin on my skin, as some people have an allergy to it and can develop a poison oak type of reaction.
And if you aren't allergic to it, you can become sensitive to it, so best avoid the situation and cover up.

Once it's cured it's completely harmless, clear, and hard as nails.
Just like what I wanted glass for, so I gave it a go.


turtles on the window sill while the 'water' cures


paraphernalia


You have to be really precise in mixing the A and B volumes. That's what the syringes are for.
The straws are for stirring them together.
And once mixed you have a limited working time before it starts to 'go off'.
And you have to keep it quite warm (ideally 140ĀŗF) while it sets, or it will never cure completely.
So the window sill and a lamp took care of that.
The bronze was too hot to touch all afternoon.

Well I really like the effect, especially with a greeny colored patina under it, to contrast with the turtles.
It's got me interested in coming up with other things to do with it!

Mike finished the metalwork on my tree frogs on a vine and did a very nice job on the patina (of course!).
I'm undecided as yet about which base I prefer. I'm having the round metal one all tarted up so I can compare them side by side. I like its minimal profile, but I also like the reflectiveness of the granite.
We'll see...
Mike Masse doing his thing on my tree frogs on a vine

unfinished metal base

Barkin' Ball came along unexpectedly quickly this year. I almost didn't get my mice in on time!
Yee-haw! It's Barkin' Ball 2010.

These critters found a great home...
But I'm glad to say they found a great home at the end of the silent auction to benefit the humane society's animal shelter here in Santa Fe.

The Mouse Project cover and page layouts are coming along nicely, I'm using Lulu.com, so I'll have to post a few pics of them next time around. I haven't done the wordy bits yet. But soon I will have done, then as soon as the last pics come in I should be just about able to drop 'em in and be all done!


Click these links to visit my website... SteveWorthingtonArt.com - Sculpture that loves you back
or my Etsy store, CritterVille