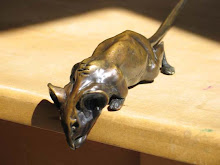
Here we are again, with my teeny tiny version of 'Senior moment'.
In the last installment I demonstrated how I made the original in a wax based clay.
So how do we turn one finished sculpture into a bunch of wax replicas ready for the foundry to then turn them into bronze?
My buddy Lee Wilson got busy making a mold. He's molded everything from the almost microscopic to bigger than a horse (see behind?). Nothing fazes Lee!
Here he is holding a work in progress on my miniature elephant...

The silicone rubber master mold is floppy (that's the yellow stuff), and needs a hard mother mold which can be screwed tightly around it to hold it in place (that's the white stuff).
I wonder is mold language developed similar to tool language, what with their male and female parts and all?
 With all the silicone rubber 'chew toys' laying about I was surprised and a bit nervous to discover from experience that mold makers seem to like to have a dog or two about the place. Must be the loneliness of the job.
Anyhow, Lee's are extremely well trained and only once got interested in sniffing the rubber when he was molding some cow bones for someone!
One rebuke put an end to that and they have NEVER messed with his handiwork, so I'm confident leaving my molds over at his place for extended periods.
So here he is tightening the bolts to keep the whole thing snugly together (you'll see why next)...

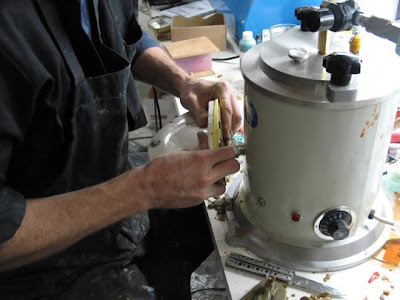
This is Lee's new toy! It's a wax injector. So for smaller stuff he can squirt wax into the mold under pressure (which will squirt out all over the place if the mold isn't securely held tight). It's quicker and more effective than painting the wax into the mold by hand on small things like this.

He experimented a bit to get the wax temperature and pressure optimal for various sized pieces. He mixed some pigment in with a blue green wax to make it a nice natural clay color. That way it's easier to see if any seam lines need cleaning up than if the wax is a day-glo color (plenty of waxes are very strange colors). You can see a few of my turtles, toads and rabbits floating about on the table too.

That metal plate with a hole in it is what he holds over the bottom of the mold when he squirts the wax in. Then it's left to cool for 20 or 30 minutes.
If the mold only has a narrow opening, he'll just use a washer.

Alright, let's pop that thing open and see what we've got!

Off comes the mother mold...

Wait for it...

Ta-daaaa!!!!
And Lee has given birth to yet another teeny tiny wax elephant. Didn't hurt did it?

Family photo below.
Strange gene pool I'd say.
 If I can get the foundry to take some pics of sprueing up the waxes, investing and breaking them open I'll add them to a future post, then finish up with metal chasing (should hardly be any except grinding the bottoms), and patina which I will do myself.
My website here


3 comments:
this is great, casting is very interesting to me. Plus your elephant sculpting tutorial was really neat as well.....good stuff
You have a very smart foundry! Looks clean enough to fry and egg on it!
ou should ask for some firy shots to illustrate the dangerouse bits that "Health and Saftey" don't look at!!!!!
I have another week or so in the foundry soon. It is quite nice to have someone to talk to, it is very lonley being and artist.
Sorry aboyut the spelling!
Post a Comment