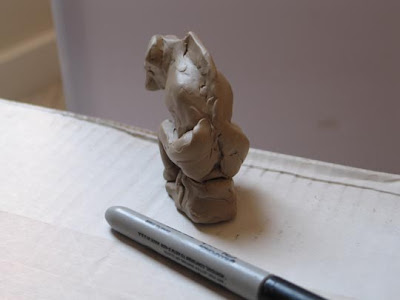

OK, so I'm making a very tiny version of my 'Senior Moment' sculpture. An elephant in Rodin's famous 'Thinker' pose. Above you can see the tools I used. Some wooden shaped things and some metal pointy things with little round blobs on the end, which I believe are called 'fillet' or 'fill-it' tools. Can't say for sure, but I think that's what they're called!
And of course my favorite tools, which I use the most, my fingers.
 The first thing I did was reduce all the measurements I have in proportion to the size elephant I'm making. I'd taken proportional measurements from pics of elephants, anatomy books, pics of skeletons and what not, so each time I start him in a new size, I have measurements to rely on since I don't trust myself one bit to eyeball it as I go.
So above we see, from left to right, a base for him to sit on, his rib cage, pelvis, and skull.
This is the 4th time I've made him. Like a line of Mercedes cars to fit any budget!
So far the biggest is some 20 odd inches tall, and this guy is the smallest at 2.75" tall!
 Here they are all together (above). Looks like a weird fish leaping out of the water, eh?
Now you can see why I don't trust myself to eyeball proportions. Everything looks so weird at this stage I'd be second guessing myself like crazy if I didn't know it would all end up looking right later.
 Some muscles are added, so it's really handy to have anatomical reference standing by.
 The head's bizzare looking, all duck billed and strange since it's just a skull, and elephants have the strangest looking skulls of just about anything.
Oh, I did take some liberties with the length of the thighs to get the pose to work. That's the case in all four different size versions.
 I add the clay in small blobs. I find it's easier to add anatomically and keep the life in it, than scrape away excess and hope it doesn't lose its suppleness. That's just me of course, some people work subtractively from rock for instance. Mmmm, let's see, oh yes. Michelangelo springs to mind.
He was pretty handy with a subtractive approach, I'm sure you will agree!
 Notice the ear above is made up of blobs of clay depending on where the form goes. I didn't make a flat bit of clay and stick it on. There's some folds appearing around his legs and mouth as well as muscle and fat taking shape.
This is the only size of this piece that didn't need any armature support at all, since the clay is very light and sticky, and he's so small.
 The clay I use is jmac wax based plastilene, the softest one they do. It can get a bit messy if you aren't careful. When using tools, I go with the same approach I learned when painting. Get the biggest one you can that will do the job, that way I don't end up with over fussy patting effects, just nice clean broad strokes. That's the most important thing to maintain. Adding details is easy later, but taking an over fussily detailed sculpture back to something more elegantly simple is much more difficult. Not least because you don't want to scrape back all that hard work you put in!
 I might fiddle around with him a bit more, but for now he's pretty much done.
One thing I've learned making small stuff which is cast solid (not hollow like bigger stuff) using a more brittle plaster investment than ceramic shell is to make sure not to have any deep recesses with sharp bottoms. You have to smooth them out with the round blob on a stick tool. Otherwise, bits of investment fall off and float around in the bronze during casting, only to surface as pits all over the place. A tiny amount is tolerable, but if you have lots of grooves cut into your original piece, say with a knife or other sharp tool, it's bad news later.

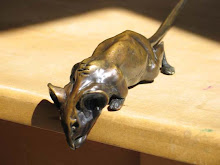
 The pic below was sent to my man at the foundry to show him where the tunnels are and see if it will give him any problems with mold making and casting. The mouse is for scale (he knows how big it is) since if you cast solid bronze beyond a certain size, you run into all kinds of shrinkage problems.
Especially if it has skinny protruberances, since ideally the metal is runnier and hotter for skinny things (or it won't make it to the ends), but cooler and thicker for larger bodied things (or it will shrink away from the mold as it cools). Both in one go can be problematic since you can only pour the metal at one temperature for the whole piece.
If elephants are scared of mice this guy must be terrified!
 Keep your eyes peeled for the finished bronze (I'd say give it a month or two)!
I'm pretty excited to see it all done!


3 comments:
I loooooove your blog
your work is fantastic
the toads are just great
Thanks for sharing this technique. I've always wanted to try to sculpt something to cast in bronze since I work at a foundry, but it seemed so overwhelmingly advanced.
I guess if I had thought about it, the final details not being the immediate focus makes the startup not so over-whelming afterall.
Thanks! :D
Steve your work just makes my year. Wrestling toads, Blinky Mouse one wonder after the other. Thanks for sharing this with everyone
Take care
Liz
Post a Comment