 |
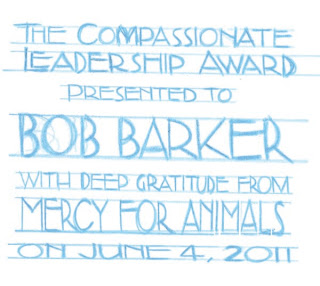
| finished plaque, added after this post was first published |
I got an unexpected call the other day from Mercy For Animals.
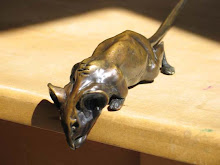
They saw my mice up for silent auction at the Humane Society's Genesis Awards recently.
They wanted to know if I could make a calf in bronze they could award to Bob Barker on June 4th, so they'd need it shipped by May 25th.
Mmm.
Great opportunity, but not enough time to research, make, mold, pull waxes, invest, burn out, cast, clean up and create a patina on a calf in the round!
I wondered if they might fancy a plaque instead?
That would be do-able, with hopefully some wiggle room in case of any unexpected casting issues.
'Perfect', came the reply!
I think Bob Barker is a great name for someone who supports animal activism.
After all, plenty of creatures bob up and down, and then there's barking...
I wonder if he ever just lets loose and bobs about the house barking up a storm at the same time?
I would;
If that was my name.
Anyhow, a combination of lots of calf photo's from Mercy For Animals, and my own results from digging for more, along with some anatomical info got me familiar enough with the shapes and proportions to design my plaque.
I have always enjoyed the stylistic sensibilities of a lot of Art Noveau, Art Deco, and the Arts and Crafts movements.
I wanted to incorporate that hand crafted feel to the lettering as well as the relief, so I whipped out my pencils and got busy.
I did the lettering first so I could see what space I might have left over to work with for the image.
I scanned them and jiggled them about a bit in photoshop...
Next operation: transfer the image to my masonite board and start laying on some clay!
I used some white trace down paper (kind of a white version of carbon paper).
Oh, those black blocks are magnets. I made my drawing board from thin foamcore over sheet metal so I can have it up at an angle and keep things in place.
After taking care of the furthest away elements I used wax paper over my drawing to make the background legs since they lay over the far background and I'd get it all chewed up if I tried to do it in place.
Getting it off the wax paper is a bit tricky since I prefer a fairly soft and quite sticky wax based clay!
Popping it in the freezer for a few minutes stiffens it up a bit, and pressing the clay into my fingers while folding the paper back on itself seems to do the trick...
Anyhow, as you can see, since I'm an artist living in Santa Fe I've enjoyed myself giving it a bit of a South West feel with the distant rain and what have you.
The clouds and terrain certainly make great design elements.
What a spooky looking calf!
You have be very careful when putting elements together that the whole doesn't get disjointed, all of unrelated thicknesses and what have you.
But I find keeping a careful cross reference back and forth throughout the process allows things to work out fine...
So far so good...
 | ||
| Ignore everything in focus!! |
My camera thought I wanted to take a pic of the floor (it's so very interesting, after all!).
The blurry strip in the foreground is an edge-on view after sticking my smaller masonite panel onto a slightly larger one, and kind of 'grout filling' between them with clay.
I took the pic to show how low the bas relief is.
By being careful how I define overlapping planes in the sculpture I've been able to achieve a good sense of three dimensional form, in barely more than two dimensions.
I suppose drawing for a living my whole life has helped out with that!
Next time...
LETTERING!
Incidentally, there's no spoilers here since I learned that Bob knows he's getting awarded and I have been given the all clear to post 'in progress' reports!
Click these links to visit my website... SteveWorthingtonArt.com - Sculpture that loves you back
or my Etsy store, CritterVille
or my Etsy store, CritterVille
,


No comments:
Post a Comment