They raved enthusiastically about Lee's mold making, by the way.
But back to casting issues. When you cast pieces hollow you can run into a bit of a problem, depending on the shape.
This might get a bit confusing to follow! My attempts at describing it are far from perfect!
Once you have your thin wax (like half of one of those hollow easter eggs), you have to coat both the inside and outside in hard ceramic shell. To do this you dip it into a slurry, let it dry, and repeat several times, over several days.
Trouble is, if you imagine filling a cup made of chocolate by gripping the rim and dipping it into batter bottom first, it fills up and is so heavy to lift out that things can break.
Or at best, the slurry is so far down inside a long skinny cup that no air gets to it to dry it out.
It would be easier if the cup had a hole in the bottom. Which is usually about where anything's head would be.
With a hole in the bottom, our cup would fill up from the bottom (coating the inside and outside simultaneously) and drain when you pull it back out.


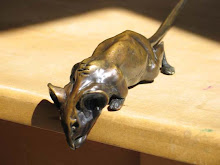
So as you can see with the toad, you remove a 'window' to let the slurry run out, so it can thinly coat both the inside and the outside of the wax (which of course later is melted out and bronze poured into the empty void).
Then the window piece (like a piece removed from the bottom of a cup) is cast separately and welded back in and the join cleaned up later.
Well with my turtle and tree frogs I didn't want any windows cut out and welded back in, but they were still going to be cast hollow.
So instead, once you have your hollow wax sculpture, you push some bronze pins through it.
You dip the wax into the slurry (like pushing a cup bottom first into some batter), but don't let it spill over the edge to the inside.
The inside is dealt with separately.
It is completely filled with a plaster type material that dries more easily. The plaster stuff is held in place by the pins (which are also held by the ceramic shell on the outside), so when the wax is melted out the inner lump of plaster doesn't fall to one side or the other (if it did, you'd have a thick bronze on one side, and holes in the other).
Then, when the plaster is set, the wax is melted out and the bronze is poured into the space that the wax left behind, the resulting bronze critter, once the ceramic shell on the outside, and the plastery stuff on the inside is removed, appears to have pins pushed into it (and you can see them inside too).
But no holes in their heads to mess about with later.
Just a couple of pins to grind off and smooth over.
Interestingly I was introduced to the 'hole in the head' in shot form during my years in Hong Kong.
Martyn, who was tending bars at the time (just about everyone did a stint behind the bar at one point or other) showed me a layered drink in a shot glass. It was three layers, one of Sambuka and one of Vodka, with a lethal red line of tabasco in between.
Downed in one and called a 'hole in the head', it was designed to make your eyes water!
My website, my Etsy store.


No comments:
Post a Comment