Learn from my mistakes. I've make every one in the book, including some no self respecting granite polisher has even heard of!
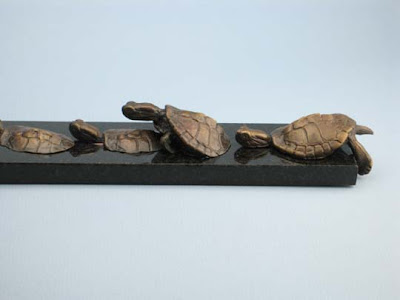
I decided to make a mini version of 'bumper to bumper', my turtle traffic jam. So I needed to make a bunch of small granite bases by cutting up some 12" tiles and polishing or honing the edges.
Oh, here's my legal disclaimer. Make sure of course to wear proper safety gear for all steps and adhere to the safety instructions that come with your equipment. You follow my advice entirely at your own risk so consult a professional before starting. My advice is merely for your amusement, not intended to be followed. Think that covers it? OK, here goes...

There's a lot of steps involved, and you save youself some MAJOR headaches by being really careful at every stage, but especially the early stages.
Here's my wet tile cutter (7" diamond blade I believe). The cheapest one I could find at
Harbor Freight. There's a plastic tray full of water underneath which the bottom of the circular saw blade dips in to keep everything nice and wet (or you'll scorch the tiles). Just be sure not to electrocute yourself in the process.
I've noticed granite cut on a professional, permanently installed machine operated by computer is MUCH smoother on the edge after cutting than the cheapo wet tile cutter I have. I don't know anything about in between models, but I guess more expensive is probably better, and will likely make edge polishing easier if you have one since you'll be (presumably) starting with a smoother cut.
The slower you ease the tiles through, the nicer your cut will be. If you stop and start you'll likely get a 'step' in the cut, which is not even worth trying to fix later. Ditch it and try again. REALLY slow, straight and continuous is the key.
And read and follow all the safety instructions relating to the saw or else you might lose fingers.
Nice lawn eh? It's plastic. We bought our house from a golf fanatic. He would shudder to see his perfectly smooth putting lawn these days. Meridee keeps threatening to tear it up and put real grass in, but I like it. It's a handy work surface. We painted our shelves on it too.
The hose was to fill the tray. Of course you won't be hosing your equipment while you work, or if it's plugged in.

No matter how careful I am, I still get this happening once in a while. When you get to the end it can break off like this. That is salvageable.

Here's my bits of tile all clamped to my 'table'. I can get to 2 edges on each one at a time, which is the equivalent of doing 2 complete bases at once, since I've got 4 up at once. There's lots of weight on the top to keep it from vibrating too much. I should have a thicker surface since it still vibrates in some places.

Below are the diamond pads backed with velcro in increasing grades of fineness. To go for a honed finish (less shiny than the polished surface of the tile) you need to use 50, 100, 200 and 400 grit (in that order). For a full polish, you need to keep going through the other 4 pads.
First up though, you 'll need to use the 'cup wheel' I think it's called, to carefully take off those sticky out bits where the tiles broke off at the end of making a cut with the saw. That's the black thing on the right.
Be REALLY careful not to over do it, once you grind below the level of the edge you've blown it!
Use a really show rpm, and keep checking by feeling the edge of the tile until you're dead flush with the edge.

You can see the tile's cut edge below, as well as some of that rubbery shelf liner you can get from the supermarket. That stuff is unbelievably useful. I use it for everything. I've even seen tiny squares of it sold as 'non slip key/sunglasses/whatever mats' to put on your dashboard. Just buy a roll of it and see how often it comes in handy.

When I first got my wet polisher (it has to be a special wet polisher that pipes water through to keep the pads wet) I was totally clueless about how to use it.
My first mistake was quite dramatic. I forgot to attach a polishing pad to the velcro backing wheel (just like you can see above: no pad attached), and succesfully ground off the velcro in a few seconds. I thought all the little bits of black stuff must be granite. So that put an end to my edge polishing until my next backing pad (aluminum and velcro) arrived in the mail from
toolocity.
And another thing, I'd have it on at max rpm's, and have the water turned way up, so birds could hover several hundred feet above my head and get a nice bird bath while I was using it.
Now I know to keep the rpm's really low (first few settings on the dial are fine) and just let the water be coming out at a trickle. It will still spray up into your eyes, so you'll need some good goggles.
And yet another thing, if you try and rush through the grades (because it's really boring and you just can't wait to be done), you'll no doubt find some scratches right where you don't want them, and have to go right back to 50 grit and start over.
Polishing granite is an abrasive process. You grind down scratches with finer scratches, one step at a time, until your final scratches are so fine it looks shiny. They're too fine to see at 400 grit, which gives a honed finish. A smooth, non reflective edge.
I have found that the first stage is the most crucial. Use slightly faster rpm's (to get through those nasty rough saw cuts), and take your time doing the 50 grit. Then wipe down the wet tiles and wipe the edges so they can dry out and in a few minutes carefully check to see that the saw marks are all closed up. If you can see them now, you'll be seeing them much more prominently later.
Definitely take that 'time out' to check after the 50 grit. You'll be slapping yourself about all over later if you don't.

Above it's taken to a honed finish. Since I want the surface of the tile to mimic water, I wanted the sides to be less shiny than the top.
Below I am working on an edge. Use it upright like that, and use the top portion of the disc. Don't go down towards the middle. If it was a clock, you'd be using the area around 11, 12 and 1 .
Maybe go down to 10 and 2.
Staying near the top is more important on thicker bases than quarter inch thick tile, but since the pad will bow around the edge if you're using the middle of the pad (3 o'clock, across to 6 o'clock), the middle of the tile edge gets left and the top and bottom of the edge get polished.
Go slow, use low rpm's, keep using the pad near its edge, not its middle.
If you can watch a pro in action for 2 minutes you'll learn a whole lot more as well.
If you want to add a little bevel to take off the sharpness of the edge along the top, use low rpm's, and wipe down and check often. It's really easy to over do it. Use a light touch.

The hat I was wearing re-directed the spray right under the edge of my newest goggles right into my eyes, so I switched it for a wool beany which I could cover the gap with.
Of course I had the string tucked into my t-shirt. Don't have dangly clothes doing anything like this, and wear a waterproof jacket (it will get plenty wet and have finely ground granite dust mixed in with the water).
Oh, all that green gravel came with my aquarium that I kept a
Cane Toad in to pose for my earlier sculptures of toads. I dumped the gravel out when I got a turtle, to study for my turtle sculptures.
It's also had mice in it but it's empty right now.
Grinding edges is no fun.
Again, use all proper safety gear, follow safety advice for tile saws and polishers by reading the instructions and consulting a professional before starting.
Or just get your bases from
the base shop.
Next post: putting together my mini bumper to bumper with my newly made granite base.
My
website


